相信這兩者差別,只要是做系統的人應該都會很了解。但對於我而言,卻相當模糊。記得有次在跟老外同學閒聊的時候,他問我這兩者的差別是在哪 ? 在當下我突然發現,要講給人懂是一件很困難的事,尤其是在對某個東西半理解狀態,更難解釋。所以這篇文章就來淺淺的探討有關這兩者間的區別。
在現今每個人幾乎都有智慧型手機,而且可以同時執行超多程式,像是你在玩遊戲的同時,能夠接收到朋友的訊息、郵件或其它通知訊息。就跟在用桌機或筆電一樣,可以同時開啟好幾個應用程式。簡單來說,Process 就是 Program,就是一個應用程式,像是在手機上的 App,電腦上的 MicroSoft Word;而 Thread 就是這個 Process 裡面的一個單位執行緒 ( Unit of execution) ,如果打開了 MicroSoft Word (Process),裡面的就有很多個Threads 在跑,像是 keyboard, print, save ...etc,就這是所謂的 Multiple-thread application。
Background
在談到Process和thread,或是說運行一個App,有三個非常重要的東西來負責管理:CPU, Memory (RAM), Memory controller。Memory controller 是一個介於CPU和RAM的界面,負責傳輸Data到CPU。當我們寫好一個程式,然後compile成binary code,這些binary code就會存放在RAM,接著透過 controller 把 data 傳到CPU。CPU內部有一個 queue line,也就是pipe line,依照FILO的原則放進這line當中來等待執行。
Multiple-thread application
那到底是如何實現multiple thread和multiple process ? 以Linux為例子,每一個process都會有PID, memory space, priority 和 schedule,依據priority和schedule來切換所有processes,這切換時間就叫 time slot,通常是在 1ms。
而一個process又有多個threads,這些threads 一般都是來靠 "鎖" (Lock) 來管理。如果這鎖沒管理好,很容易造成這個process當掉,更嚴重則是系統崩潰。像是我們常聽到 "死鎖" (Dead Lock) 就是因為 Thread 1 等待 Thread 2,而 Thread 2 又等待 Thread 1 釋放鎖而造成死循環。所以如何設計好這些threads 對於一個program or process 是非常重要的。
2/07/2017
2/02/2017
What are advantages of knowing C language if you don't even know it ?
今天在Quora上面看到有人提問說 : 到底了解C語言有什麼好處 ?
這問題讓我印像滿深刻的。在我就讀期間,為了要找一份實習工作,我不得不從embedded system領域轉換成Web development。剛開始的確有點不太適應,總覺得很多寫法都不一樣。到後面才了解其實不是對Javascript不適應,正確來說是對Web和DOM概念不熟悉才是。
不管是Java或是Javascript,如果對C有一定程度熟悉的話,掌握它們的基本語法其實用不到二天的時間。就像上面有人舉了這個例子 :
試著用Javascript去run下這行code :
你會得到 "4 and 5" 的結果。如果了解C,一定馬上就知道為什麼一個任意數值並不會因為call function 被改變,而array會。
因為C有pointer,而pointer的作用其實跟array是一樣的。如果它們被當作某一個function的參數時,這時就等同於把這個值(被指向或是一個陣列)的地址一起傳送過去。所以這個function真正做的事 : 訪問這個變數的地址,改變這個地址的值。
可是任意數值並沒有。雖然一開始它們己經被賦予了某個值,存放在某個記憶體位址,可是當它們被當作做某個function的參數時,這function是沒辦法訪問這個變數的地址,它能改變的值只能作用於這個function的執行緒裡面,並不能影響其它執行緒的訪問。所以在跳出該function的時候,另一個執行緒訪問同樣的變數其實並不受任何影響。簡單來說,makeChanges所訪問aNumber的地址和外部訪問的myNumber的記憶體位址其實是完全不一樣的。
所以大家才會說,pointer其實是無所不在的,只是被藏起來罷了,因為它真的不好理解。但就如上面有人說 :
電腦硬體是很難以理解的。我們越不去看它,寫出一個程式去叫電腦做些事是越容易。 但我們越深入了解它,我們就更加理解真正要處理問題和原因是什麼。
這問題讓我印像滿深刻的。在我就讀期間,為了要找一份實習工作,我不得不從embedded system領域轉換成Web development。剛開始的確有點不太適應,總覺得很多寫法都不一樣。到後面才了解其實不是對Javascript不適應,正確來說是對Web和DOM概念不熟悉才是。
不管是Java或是Javascript,如果對C有一定程度熟悉的話,掌握它們的基本語法其實用不到二天的時間。就像上面有人舉了這個例子 :
試著用Javascript去run下這行code :
1 2 3 4 5 6 7 8 9 | var myNumber = 4; var myArray = [4]; makeChanges( myNumber, myArray ); console.log( myNumber + " and " + myArray); function makeChanges( aNumber, anArray ) { aNumber++; anArray[0]++; } |
你會得到 "4 and 5" 的結果。如果了解C,一定馬上就知道為什麼一個任意數值並不會因為call function 被改變,而array會。
因為C有pointer,而pointer的作用其實跟array是一樣的。如果它們被當作某一個function的參數時,這時就等同於把這個值(被指向或是一個陣列)的地址一起傳送過去。所以這個function真正做的事 : 訪問這個變數的地址,改變這個地址的值。
可是任意數值並沒有。雖然一開始它們己經被賦予了某個值,存放在某個記憶體位址,可是當它們被當作做某個function的參數時,這function是沒辦法訪問這個變數的地址,它能改變的值只能作用於這個function的執行緒裡面,並不能影響其它執行緒的訪問。所以在跳出該function的時候,另一個執行緒訪問同樣的變數其實並不受任何影響。簡單來說,makeChanges所訪問aNumber的地址和外部訪問的myNumber的記憶體位址其實是完全不一樣的。
所以大家才會說,pointer其實是無所不在的,只是被藏起來罷了,因為它真的不好理解。但就如上面有人說 :
電腦硬體是很難以理解的。我們越不去看它,寫出一個程式去叫電腦做些事是越容易。 但我們越深入了解它,我們就更加理解真正要處理問題和原因是什麼。
1/27/2017
Distributed Databases - Bond Energy Algorithm
這個演算法算是在去唸書期間,以第一學期來說,算是最麻煩的,即使公式都給了。這門課是講關於分散式系統資料庫,對我來說跟天書沒什麼兩樣,因為那時連資料庫碰都沒碰過,一點概念都沒有。而且現在才紀錄下來好像太晚了點.....都忘了差不多了XDD
總而言之,這門課的第一作業就是叫我們實現Bond Energy Algorithm。在講它之前,有必要先講一些分散式資料庫的簡單觀念說一下。
分散式資料庫是一群資料庫系統(或是所謂的節點)的集合,它們都是透過網路來連結,而且彼此互相之間是有關聯的。它被應用在非常廣的範圍,像是Google 就是用分散式系統管理資料庫,不然一個資料點掛了就全部陣亡。舉例來說,小明在台北市查找一本書。實際上這連線是不止會傳回台北所在的資料,也會向其它縣市的資料庫進行查尋(如果沒有或是全部查找)。
在分散式資料庫系統中,我們通常須將存放資料的表格進行分割,並放在多個資料庫節點上。而這分割又被分為Horizontal / Vertical fragmentation。而BEA就是在設計Vertical Fragmentation Algorithm時,基於Attribute affinity values,找出一組Attirbutes的關聯的意義。
BEA的演算法公式如下 :

看起來雖然滿複雜,但實現這公式是滿簡單的。麻煩的是要算出AA matrix。當時老師不打算用課本上的演算法,改用一個叫做 Cosine-based similarity 的算法。所以AA matrix 的算法變成如下 :

這個程式都放在Github,需要的人請自取
整個過程都有註解,所以應該還滿好理解,只是執行速度太慢就是了...而且當時寫這作業沒想其它的,看起來真有點亂...
總而言之,這門課的第一作業就是叫我們實現Bond Energy Algorithm。在講它之前,有必要先講一些分散式資料庫的簡單觀念說一下。
分散式資料庫是一群資料庫系統(或是所謂的節點)的集合,它們都是透過網路來連結,而且彼此互相之間是有關聯的。它被應用在非常廣的範圍,像是Google 就是用分散式系統管理資料庫,不然一個資料點掛了就全部陣亡。舉例來說,小明在台北市查找一本書。實際上這連線是不止會傳回台北所在的資料,也會向其它縣市的資料庫進行查尋(如果沒有或是全部查找)。
在分散式資料庫系統中,我們通常須將存放資料的表格進行分割,並放在多個資料庫節點上。而這分割又被分為Horizontal / Vertical fragmentation。而BEA就是在設計Vertical Fragmentation Algorithm時,基於Attribute affinity values,找出一組Attirbutes的關聯的意義。
BEA的演算法公式如下 :

1 2 3 4 5 6 7 8 9 10 11 12 13 14 15 16 17 18 19 20 21 22 23 24 25 26 27 28 29 30 31 32 33 34 35 36 37 38 39 40 41 42 43 44 45 46 47 48 49 50 51 52 53 54 55 56 57 58 59 60 61 62 63 64 65 66 67 68 69 70 71 72 73 74 75 76 77 78 79 80 81 82 83 84 | /* Bond Energy algorithm input: AA (Attribute Affinity matrix) output: CA (Clustered Affinity matrix) */ //copy old AA matrix to new AA in order to avoid index mistake AAnew = new double[MATRIX_SIZE+1][MATRIX_SIZE+1]; CA = new double[MATRIX_SIZE+2][MATRIX_SIZE+2]; tempColumn = new double[MATRIX_SIZE+1]; for(int i = 1; i < MATRIX_SIZE+1; i++) { for(int j = 1; j < MATRIX_SIZE+1; j++) { AAnew[i][j] = AA[i-1][j-1]; // System.out.println("AAnew["+i+"]["+j+"] = "+AAnew[i][j]); } } //fill columns and rows for(int i = 0; i < MATRIX_SIZE+1; i++) { CA[0][i] = i; for(int j = 0; j < MATRIX_SIZE+1; j++) { CA[j][0] = j; } } for(int i = 0; i < MATRIX_SIZE+1; i++) { AAnew[0][i] = i; for(int j = 0; j < MATRIX_SIZE+1; j++) { AAnew[j][0] = j; } } // Copy the first and second columns from AA for(int i = 1; i < MATRIX_SIZE+1; i++) { CA[i][1] = AAnew[i][1]; CA[i][2] = AAnew[i][2]; } index = 3; // start from third index RightMostIndex = 2; //current rightmost index of AA. while(index <= MATRIX_SIZE) { double contrib = 0; double maxContrib = 0; //System.out.println("------ index = "+index); for(int i = 1; i < index; i++) { contrib = cont(CA[0][i-1], index, CA[0][i], AAnew); //if found the highest contribution, record it if(contrib > maxContrib) { maxContrib = contrib; record(CA[0][i-1], index, CA[0][i]); } } contrib = cont(CA[0][index-1], index, index+1, AAnew); if(contrib > maxContrib) { maxContrib = contrib; record(CA[0][index-1], index, index+1); } /* place the highest contribution */ CAplacement(); index++; } CArowplace(); CAprint(); } /* This function is to order rows according the placement of columns */ public static void CArowplace() { //double[][] temp; CAfinal = new double[MATRIX_SIZE+2][MATRIX_SIZE+2]; for(int i = 0; i <= MATRIX_SIZE; i++) { double row = CA[0][i]; CAfinal[0][i] = row; for(int j = 0; j <= MATRIX_SIZE; j++) { //temp[i][j] = CA[(int)row][j]; //System.out.println("row ="+(int)row); CAfinal[i][j] = CA[(int)row][j]; } } } |
看起來雖然滿複雜,但實現這公式是滿簡單的。麻煩的是要算出AA matrix。當時老師不打算用課本上的演算法,改用一個叫做 Cosine-based similarity 的算法。所以AA matrix 的算法變成如下 :

1 2 3 4 5 6 7 8 9 10 11 12 13 14 15 16 17 18 19 20 21 22 23 24 25 26 27 28 29 30 31 32 33 34 35 36 | /* Start - Attribute Affinity algorithm */ AA = new double[MATRIX_SIZE][MATRIX_SIZE]; DecimalFormat df = new DecimalFormat("0.0000"); for(int i = 0; i < att.size(); i++) { for(int j = 0; j < att.size(); j++) { double Aik = 0; double Ajk = 0; double AffNumerator = 0; double AffDenominator = 0; double temp = 0; double temp1 = 0; double TempSqrt = 0; double Temp1Sqrt = 0; for(int k = 0; k < query.size(); k++) { double SumAcc = 0; /* sum all accMatrix then multiply use(qk,Ai)*/ for(int site = 0; site < 3; site++) { SumAcc = SumAcc + accMatrix[k][site]; } Aik = beQueried[k][i] * SumAcc; Ajk = beQueried[k][j] * SumAcc; AffNumerator = AffNumerator + (Aik*Ajk); temp = temp + Math.pow(Aik,2); temp1 = temp1 + Math.pow(Ajk,2); } TempSqrt = Math.sqrt(temp); Temp1Sqrt = Math.sqrt(temp1); AffDenominator = TempSqrt * Temp1Sqrt; //System.out.println("Affn = "+AffNumerator); //System.out.println("Affd = "+AffDenominator); AA[i][j] = Double.parseDouble(df.format(AffNumerator / AffDenominator)); System.out.println("AA["+i+"]["+j+"] = "+AA[i][j]); } } |
這個程式都放在Github,需要的人請自取
整個過程都有註解,所以應該還滿好理解,只是執行速度太慢就是了...而且當時寫這作業沒想其它的,看起來真有點亂...
1/17/2017
I'm back
On 17th of November, I finally completed my degree of Master in Australia. This three-year journey took me a lot of efforts on assignments and projects, but really benefited from those activities during the study. To be honest, I'd never thought that one day I would have been able to graduate from foreign schools and even worked on there. I've truly appreciated my parents who give me such an opportunity to study abroad, and also thankful my girlfriend company with me in the long distance. Of course, there are many people who care about me that I really appreciate as well.
Although I'm still studying IELTS test in order to apply for PR visa after the graduation ( under 0.5 in part of listening...), updating what I've learnt from the university on this blog is my next step! I hope that by writing the blog, I could be able to organise my thoughts and review the things I learnt.
By the way, if anyone would like to look for a partner for practising IELTS speaking or something else, you can just simply send an email to me :)
10/16/2012
Can not connection to Softap for security
Kernel : 2.6.37
WiFi module : WG7310 ( Inside WL127x )
起初以為是自己從ICS移稙到JB時,Frameworks出了問題,結果不是。
底下是錯誤的log :
D/hostapd ( 2058): random: Got 5/20 bytes from /dev/random
I/hostapd ( 2058): random: Only 5/20 bytes of strong random data available from /dev/random
I/hostapd ( 2058): random: Not enough entropy pool available for secure operations
I/hostapd ( 2058): WPA: Not enough entropy in random pool for secure operations - update keys later when the first station connects
D/hostapd ( 2058): GMK - hexdump(len=32): [REMOVED]
D/hostapd ( 2058): Key Counter - hexdump(len=32): [REMOVED]
D/hostapd ( 2058): WPA: Delay group state machine start until Beacon frames have been configured
D/hostapd ( 2058): WPS: Building WPS IE for (Re)Association Response
D/hostapd ( 2058): WPS: * Version (hardcoded 0x10)
D/hostapd ( 2058): WPS: * Response Type (3)
D/hostapd ( 2058): WPS: * Version2 (0x20)
D/hostapd ( 2058): nl80211: Set beacon (beacon_set=0)
D/hostapd ( 2058): WPA: Start group state machine to set initial keys
D/hostapd ( 2058): WPA: group state machine entering state GTK_INIT (VLAN-ID 0)
D/hostapd ( 2058): GTK - hexdump(len=16): [REMOVED]
D/hostapd ( 2058): WPA: group state machine entering state SETKEYSDONE (VLAN-ID 0)
D/hostapd ( 2058): wpa_driver_nl80211_set_key: ifindex=6 alg=3 addr=0x4006f0f1 key_idx=1 set_tx=1 seq_len=0 key_len=16
D/hostapd ( 2058): broadcast key
D/hostapd ( 2058): nl80211: set_key failed; err=-2 No such file or directory)
D/hostapd ( 2058): wpa_driver_nl80211_set_operstate: operstate 0->1 (UP)
一直以為是TI的wpa_supplicant出了問題....結果竟然也不是 !
原來是kernel的某個config沒被打開,造成hostapd去產生一個隨機的dummy key時錯誤,wpa_supplicant去set key時自然會fail...
不清楚是不是所有的secure key都會通過 "/dev/random" 去對kernel做儲存,但就目前SoftAP而言,wpa_supplicant都是透過這種方式去儲存和產生所有的key number. (STA就不知道了....)
在kernel config 把 "CONFIG_CRYPTO_ANSI_CPRNG" 打開就可以解決該問題了 !
8/22/2012
NCLP R5-SP1 WLAN Dirver for modules of Jorjin the inside TI WL12xx chip
################################################################# # README # # Introduction Wlan Driver For Jorjin SiP Modules # # NLCP Version : R5_SP1 # Operation system : Linux / Android # Date : July,24 2012 # Mantainer : Dicky Chiang <dickychiang@jorjin.com.tw> # # Jorjin Technologies Inc - http://www.jorjin.com.tw/ # ################################################################# NLCP(Native Linux Communication Package) is open source,which to integrated for TI. The wlan driver will to support WG72xx/WG73xx/WG75xx of the Jorjin SiP modules. Wirelees solutions of the between TI and Jorjin: * WG72xx - Inside WL125x chip * WG73xx - Inside WL127x chip * WG75xx - Inside WL128x chip Download site: # git clone git://github.com/dickychiang/compat-wireless-r5-sp1.git ==================================================================================================== 1. Build Instructions Setting your environment: # export YOUR_PATH=`pwd` # export DRIVER_PATH=${YOUR_PATH}/# export ARCH=arm # export CROSS_COMPILE= # export PATH=$PATH: # export DESTDIR= # export KLIB= # export KLIB_BUILD=$KLIB Building: # make modules # Only modules # make install # Build modules & install to your filesystem ==================================================================================================== 2. Firmware Choose for your module type then to copy into the filesystem. For Android: # cp ${DRIVER_PATH}/jorjin/firmware/WG73xx_fw/*.bin \ /etc/firmware/ti-connectivity/ For Linux: # cp ${DRIVER_PATH}/jorjin/firmware/WG73xx_fw/*.bin \ /lib/firmware/ti-connectivity/ ==================================================================================================== 3. Copy driver module # cp ${DRIVER_PATH}/compat/compat.ko $(DESTDIR)/system/lib/modules # cp ${DRIVER_PATH}/drivers/net/wireless/wl12xx/wl12xx.ko $(DESTDIR)/system/lib/modules # cp ${DRIVER_PATH}/net/mac80211/mac80211.ko $(DESTDIR)/system/lib/modules # cp ${DRIVER_PATH}/net/wireless/cfg80211.ko $(DESTDIR)/system/lib/modules # cp ${DRIVER_PATH}/drivers/net/wireless/wl12xx/wl12xx_sdio.ko $(DESTDIR)/system/lib/modules # cp ${DRIVER_PATH}/drivers/net/wireless/wl12xx/wl12xx_spi.ko $(DESTDIR)/system/lib/modules ==================================================================================================== 4. Insert module Go to you filesystem then according to as below for insert module. # insmod compat.ko # insmod cfg80211.ko # insmod mac80211.ko Choose for your module type. # insmod wl1251 .ko # insmod wl1251_sdio .ko ==================================================================================================== ************************************ * Related WLAN tools & application * ************************************ 1. Install SoftAP & wpa_supplicant_8 with R5-SP1 WLAN driver # git clone git://github.com/dickychiang/hostap.git # cd hostap # git checkout R5_SP1_Maintenance_Release # cd ../ ; cp -rf hostap/* $MYDROID/external/wpa_supplicant_8 2. Install ti-utils (calibration tools) # git clone git://github.com/dickychiang/ti-utils.git # cd ti-utils # git checkout R5_SP1_Maintenance_Release # cd ../ ; cp -rf ti-utils $MYDROID/external/ti-utils 3. Install IW (for Android version) # git clone git://github.com/dickychiang/iw.git # cd iw # git checkout ol_R5.00.21 # cd ../ ; cp -rf iw $MYDROID/external/iw 4. Install crda(Central Regulatory Domain Agent) # git clone git://github.com/dickychiang/crda.git # cp -rf crda $MYDROID/external/crda ==================================================================================================== ************************************ * How to Calibration * ************************************ The calibrator and other useful utilities for TI wireless solution, based on wl12xx driver. Calibration is a process in which specific radio configuration parameters are generated and saved into the NVS file, later to be used by the wl12xx driver upon initialization. These configuration parameters are specific to the chip on the specific design and therefore are sent back to the driver to store in non-volatile memory for later use. Upon initialization, the wl12xx driver will load an NVS file where it expects to read those parameters and send them to the chip. The NVS file contains 2 main parts - one stores the calibration parameters and the other one stores initialization information required for the wl12xx driver. 1. Install ti-utils (calibration tools) # git clone git://github.com/dickychiang/ti-utils.git # cd ti-utils # git checkout R5_SP1_Maintenance_Release # make Don't forget to set your environment before make. # cp ./calibrator /bin/ 2. Copy ini files into the filesystem For Andriod: # cp ${DRIVER_PATH}/jorjin/ini_files/ \ ${TAGET_OUT}/etc/firmware/ti-connectivity/TQS_S_2.6.ini For Native Linux: # cp ${DRIVER_PATH}/jorjin/ini_files/ \ ${ROOT_FS}/lib/firmware/ti-connectivity/TQS_S_2.6.ini 3. Execute calibrator on your board # rmmod wl12xx_sdio.ko # calibrator plt autocalibrate Device name. Probably wlan0 Full path to wl12xx_sdio.ko kernel module Full path to Radio param ini file Full path of nvs file. Must be the real path as wl12xx will load it For example: # calibrator plt autocalibrate wlan0 \ /system/lib/modules/wl12xx_sdio.ko \ /etc/firmware/ti-connectivity/TQS_S_2.6.ini \ /etc/firmware/ti-connectivity/wl1271-nvs.bin 00:01:02:03:04:05 Appendix: How to change MAC address in calibrated NVS # calibrator set nvs_mac [ ] If the MAC address missing, the random valid value will be added ==================================================================================================== ********************** * Building for Linux * ********************** 1. Install libnl-2.0 First to download it: # git clone git://github.com/dickychiang/libnl-2.0.git And export environment or can reference to script 'm.sh' # export ROOTFS_PATH= # export PATH= :$PATH # export CROSS_COMPILE= # ./configure --prefix=${ROOTFS} CC=${CROSS_COMPILE}gcc --host=arm-linux LD=${CROSS_COMPILE}ld # make # make install ==================================================================================================== 2. Install IW tool for wireless configuration Download source code : # git clone git://github.com/dickychiang/iw-linux.git Export environment or reference script 'm.sh' for compile. # export PKG_CONFIG_PATH=${ROOTFS_PATH}/lib/pkgconfig:$PKG_CONFIG_PATH # export PKG_CONFIG_LIBDIR=${ROOTFS_PATH}/lib/:$PKG_CONFIG_LIBDIR # export NFSROOT=${ROOTFS_PATH} # make PREFIX=${NFSROOT} CC=${CROSS_COMPILE}gcc # make PREFIX=${NFSROOT} CC=${CROSS_COMPILE}gcc install ==================================================================================================== 3. How to use iw tool Usually is commonly commands the following. # iw wlan0 scan // Scan for Wifi network # iw wlan0 connect // Connect to specifc Access point (by its SSID) # iw wlan0 disconnect // Disconnect from the Access point that the Station is connected too # iw wlan0 link // Verify Link Status For example as below: # iw wlan0 scan BSS 00:13:46:dd:e2:e9 (on wlan0) TSF: 362449530606 usec (4d, 04:40:49) freq: 2452 beacon interval: 100 capability: ESS Privacy ShortPreamble (0x0031) signal: -50.00 dBm last seen: 270 ms ago SSID: jjap Supported rates: 1.0* 2.0* 5.5* 11.0* 22.0 DS Parameter set: channel 9 ERP: Extended supported rates: 6.0 9.0 12.0 18.0 24.0 36.0 48.0 54. # iw wlan0 connect jjap keys 0:0397430202 # iw wlan0 link Connected to 00:13:46:dd:e2:e9 (on wlan10) SSID: jjap freq: 2452 RX: 9400 bytes (96 packets) TX: 0 bytes (0 packets) signal: -48 dBm tx bitrate: 1.0 MBit/s bss flags: short-preamble dtim period: 3 beacon int: 100
2/17/2012
Wlan driver of Jorjin SiP modules
if your use wlan modules for Jorjin, can reference my integrated of wlan driver in github.
The wlan driver will be supported WG7210, WG73x, WG75 modules,it running on the Linux 2.6.30 upon and Android GB/ICS.
So if your are interested, let us go ahead !
#################################################################
#
# NLCP Version : R4_12
# Operation system : Linux / Android
# Date : Jan 2012
# Mantainer : Dicky Chiang
#
#################################################################
NLCP(Native Linux Communication Package) is open source with integrated for TI.
The wlan driver will to support WG72, WG73x, WG75x series of Jorjin SiP modules.
Dirver download site:
$ git clone git://github.com/dickychiang/compat-wireless-r4-12.git
========================================================================
1. How to build the driver
You can refer the script file "m.sh" for setting environment. For example:
# Export parameter
$ export ARCH=arm
$ export CROSS_COMPILE=
$ export KERNEL_PATH=
$ export KLIB=${KERNEL_PATH}
$ export KLIB_BUILD=${KERNEL_PATH}
# Compile it
$ make modules
========================================================================
2. Install .ko files
If you are compiled is completed, need to copy file ".ko" to your filesystem. Or reference the script file "cp.sh".
For example:
$ export ROOTFS=
$ cp compat/compat.ko ${ROOTFS}/lib/modules/
$ cp net/mac80211/mac80211.ko ${ROOTFS}/lib/modules
$ cp net/wireless/cfg80211.ko ${ROOTFS}/lib/modules
* WG72x
$ cp drivers/net/wireless/wl1251/*.ko ${ROOTFS}/lib/modules
* WG73x/WG75x
$ cp drivers/net/wireless/wl12xx/*.ko ${ROOTFS}/lib/modules
========================================================================
3. Firmware
Select your type of Jorjin SiP modules then to copy in filesystem.
For example:
$ cp jorjin/wg73x_fw/*.bin ${ROOTFS}/lib/firmware/ti-connectivity
========================================================================
4. Insert module
If boot in system, according to as below for insert module.
$ insmod compat.ko
$ insmod cfg80211.ko
$ insmod mac80211.ko
For your type.
$ insmod wl1251.ko
$ insmod wl1251_sdio.ko
********************************************
* Wireless Configuration (For Linux system)*
********************************************
----------------------------------------------------------------------------------------------------
IW commands are Linux based commands that are used as configuration utility for wireless devices.
IW commands also provide connection to WLAN devices however it is not supported advance security modes (supports Non secured networks and WEP only) therefore we normaly use that option for debug mode only while working without WPA supplicant.
IW commands is use 'nl80211' interface, so we need to install 'libnl' first then to support it.
----------------------------------------------------------------------------------------------------
1. Install libnl-2.0
First to download it:
$ git clone git://github.com/dickychiang/libnl-2.0.git
And export environment or can reference to script 'm.sh'
$ export ROOTFS_PATH=
$ export PATH=:$PATH
$ export CROSS_COMPILE=
$ ./configure --prefix=${ROOTFS} CC=${CROSS_COMPILE}gcc --host=arm-linux LD=${CROSS_COMPILE}ld
$ make
$ make install
========================================================================
2. Install IW tool for wireless configuration
Download source code :
$ git clone git://github.com/dickychiang/iw-linux.git
Export environment or reference script 'm.sh' for compile.
$ export PKG_CONFIG_PATH=${ROOTFS_PATH}/lib/pkgconfig:$PKG_CONFIG_PATH
$ export PKG_CONFIG_LIBDIR=${ROOTFS_PATH}/lib/:$PKG_CONFIG_LIBDIR
$ export NFSROOT=${ROOTFS_PATH}
$ make PREFIX=${NFSROOT} CC=${CROSS_COMPILE}gcc
$ make PREFIX=${NFSROOT} CC=${CROSS_COMPILE}gcc install
========================================================================
3. How to using the iw tool
Usually, the following is commonly commands.
$ iw wlan0 scan // Scan for Wifi network
$ iw wlan0 connect // Connect to specifc Access point (by its SSID)
$ iw wlan0 disconnect // Disconnect from the Access point that the Station is connected too
$ iw wlan0 link // Verify Link Status
For example as following:
$ iw wlan0 scan
BSS 00:13:46:dd:e2:e9 (on wlan0)
TSF: 362449530606 usec (4d, 04:40:49)
freq: 2452
beacon interval: 100
capability: ESS Privacy ShortPreamble (0x0031)
signal: -50.00 dBm
last seen: 270 ms ago
SSID: jjap
Supported rates: 1.0* 2.0* 5.5* 11.0* 22.0
DS Parameter set: channel 9
ERP:
Extended supported rates: 6.0 9.0 12.0 18.0 24.0 36.0 48.0 54.
$ iw wlan0 connect jjap keys 0:0397430202
$ iw wlan0 link
Connected to 00:13:46:dd:e2:e9 (on wlan10)
SSID: jjap
freq: 2452
RX: 9400 bytes (96 packets)
TX: 0 bytes (0 packets)
signal: -48 dBm
tx bitrate: 1.0 MBit/s
bss flags: short-preamble
dtim period: 3
beacon int: 100
The wlan driver will be supported WG7210, WG73x, WG75 modules,it running on the Linux 2.6.30 upon and Android GB/ICS.
So if your are interested, let us go ahead !
#################################################################
#
# NLCP Version : R4_12
# Operation system : Linux / Android
# Date : Jan 2012
# Mantainer : Dicky Chiang
#
#################################################################
NLCP(Native Linux Communication Package) is open source with integrated for TI.
The wlan driver will to support WG72, WG73x, WG75x series of Jorjin SiP modules.
Dirver download site:
$ git clone git://github.com/dickychiang/compat-wireless-r4-12.git
========================================================================
1. How to build the driver
You can refer the script file "m.sh" for setting environment. For example:
# Export parameter
$ export ARCH=arm
$ export CROSS_COMPILE=
$ export KERNEL_PATH=
$ export KLIB=${KERNEL_PATH}
$ export KLIB_BUILD=${KERNEL_PATH}
# Compile it
$ make modules
========================================================================
2. Install .ko files
If you are compiled is completed, need to copy file ".ko" to your filesystem. Or reference the script file "cp.sh".
For example:
$ export ROOTFS=
$ cp compat/compat.ko ${ROOTFS}/lib/modules/
$ cp net/mac80211/mac80211.ko ${ROOTFS}/lib/modules
$ cp net/wireless/cfg80211.ko ${ROOTFS}/lib/modules
* WG72x
$ cp drivers/net/wireless/wl1251/*.ko ${ROOTFS}/lib/modules
* WG73x/WG75x
$ cp drivers/net/wireless/wl12xx/*.ko ${ROOTFS}/lib/modules
========================================================================
3. Firmware
Select your type of Jorjin SiP modules then to copy in filesystem.
For example:
$ cp jorjin/wg73x_fw/*.bin ${ROOTFS}/lib/firmware/ti-connectivity
========================================================================
4. Insert module
If boot in system, according to as below for insert module.
$ insmod compat.ko
$ insmod cfg80211.ko
$ insmod mac80211.ko
For your type.
$ insmod wl1251
$ insmod wl1251_sdio
********************************************
* Wireless Configuration (For Linux system)*
********************************************
----------------------------------------------------------------------------------------------------
IW commands are Linux based commands that are used as configuration utility for wireless devices.
IW commands also provide connection to WLAN devices however it is not supported advance security modes (supports Non secured networks and WEP only) therefore we normaly use that option for debug mode only while working without WPA supplicant.
IW commands is use 'nl80211' interface, so we need to install 'libnl' first then to support it.
----------------------------------------------------------------------------------------------------
1. Install libnl-2.0
First to download it:
$ git clone git://github.com/dickychiang/libnl-2.0.git
And export environment or can reference to script 'm.sh'
$ export ROOTFS_PATH=
$ export PATH=
$ export CROSS_COMPILE=
$ ./configure --prefix=${ROOTFS} CC=${CROSS_COMPILE}gcc --host=arm-linux LD=${CROSS_COMPILE}ld
$ make
$ make install
========================================================================
2. Install IW tool for wireless configuration
Download source code :
$ git clone git://github.com/dickychiang/iw-linux.git
Export environment or reference script 'm.sh' for compile.
$ export PKG_CONFIG_PATH=${ROOTFS_PATH}/lib/pkgconfig:$PKG_CONFIG_PATH
$ export PKG_CONFIG_LIBDIR=${ROOTFS_PATH}/lib/:$PKG_CONFIG_LIBDIR
$ export NFSROOT=${ROOTFS_PATH}
$ make PREFIX=${NFSROOT} CC=${CROSS_COMPILE}gcc
$ make PREFIX=${NFSROOT} CC=${CROSS_COMPILE}gcc install
========================================================================
3. How to using the iw tool
Usually, the following is commonly commands.
$ iw wlan0 scan // Scan for Wifi network
$ iw wlan0 connect
$ iw wlan0 disconnect // Disconnect from the Access point that the Station is connected too
$ iw wlan0 link // Verify Link Status
For example as following:
$ iw wlan0 scan
BSS 00:13:46:dd:e2:e9 (on wlan0)
TSF: 362449530606 usec (4d, 04:40:49)
freq: 2452
beacon interval: 100
capability: ESS Privacy ShortPreamble (0x0031)
signal: -50.00 dBm
last seen: 270 ms ago
SSID: jjap
Supported rates: 1.0* 2.0* 5.5* 11.0* 22.0
DS Parameter set: channel 9
ERP:
Extended supported rates: 6.0 9.0 12.0 18.0 24.0 36.0 48.0 54.
$ iw wlan0 connect jjap keys 0:0397430202
$ iw wlan0 link
Connected to 00:13:46:dd:e2:e9 (on wlan10)
SSID: jjap
freq: 2452
RX: 9400 bytes (96 packets)
TX: 0 bytes (0 packets)
signal: -48 dBm
tx bitrate: 1.0 MBit/s
bss flags: short-preamble
dtim period: 3
beacon int: 100
1/05/2012
Porting to different the MMC interface
Author : Dicky Chiang
Date : Dec 2012
Introduce:
This document describes how to porting to a different the MMC interface.
All presentation will be based on the DM37x platform with Linux kernel 2.6.37 and NLCP WLAN driver.On Dm37x WLAN SDIO is connected to MMC2 bus. For example, the following will porting to MMC3 interface.
Step 1:
In file kernel/arch/arm/mach-omap2/board-omap3evm.c
Modify Initialization and pin-muxing if using any other MMC bus.
static struct omap2_hsmmc_info mmc[] = {
{
.mmc = 1,
.caps = MMC_CAP_4_BIT_DATA | MMC_CAP_8_BIT_DATA,
.gpio_wp = 29,
},
#ifdef CONFIG_WL12XX_PLATFORM_DATA
{
.name = "wl1271",
.mmc = 3,
.caps = MMC_CAP_4_BIT_DATA | MMC_CAP_POWER_OFF_CARD,
.gpio_wp = -EINVAL,
.gpio_cd = -EINVAL,
.nonremovable = true,
},
#endif
{} /* Terminator */
};
static struct omap_board_mux board_mux[] __initdata = {
#ifdef CONFIG_WL12XX_PLATFORM_DATA
/* WLAN IRQ - GPIO 112 */
OMAP3_MUX(CSI2_DX0, OMAP_MUX_MODE4 | OMAP_PIN_INPUT),
/* WLAN POWER ENABLE - GPIO 16 */
OMAP3_MUX(ETK_D2, OMAP_MUX_MODE4 | OMAP_PIN_OUTPUT),
/* MMC3 SDIO pin muxes for WL12xx */
OMAP3_MUX(ETK_CLK, OMAP_MUX_MODE2 |
OMAP_PIN_INPUT_PULLUP),//CLK
OMAP3_MUX(ETK_CTL, OMAP_MUX_MODE2 |
OMAP_PIN_INPUT_PULLUP),//CMD
OMAP3_MUX(ETK_D3, OMAP_MUX_MODE2 |
OMAP_PIN_INPUT_PULLUP),//DATA3
OMAP3_MUX(ETK_D6, OMAP_MUX_MODE2 |
OMAP_PIN_INPUT_PULLUP),//DATA2
OMAP3_MUX(ETK_D5, OMAP_MUX_MODE2 |
OMAP_PIN_INPUT_PULLUP),//DATA1
OMAP3_MUX(ETK_D4, OMAP_MUX_MODE2 |
OMAP_PIN_INPUT_PULLUP),//DATA0
//USB gpio40
OMAP3_MUX(GPMC_A7, OMAP_MUX_MODE4 | OMAP_PIN_OUTPUT ),
#endif
{ .reg_offset = OMAP_MUX_TERMINATOR },
};
Modify regulator supply to register in kernel when the probe host MMC slot.
static struct regulator_consumer_supply panther_vmmc2_supply =
REGULATOR_SUPPLY("vmmc", "mmci-omap-hs.2")
Step 2.
In file kernel/arch/arm/mach-omap2/devices.c
Add to supported MMC3 host controller at omap2_mmc_mux func.
/* For MMC3 the pins need to be muxed in the board-*.c files */
if (controller_nr == 2) {
/* MMC3 */
omap_mux_init_signal("sdmmc3_clk",
OMAP_PIN_INPUT_PULLUP);
omap_mux_init_signal("sdmmc3_cmd",
OMAP_PIN_INPUT_PULLUP);
omap_mux_init_signal("sdmmc3_dat0",
OMAP_PIN_INPUT_PULLUP);
/*
* For 8 wire configurations, Lines DAT4, 5, 6 and 7 need to be muxed
* in the board-*.c files
*/
if (mmc_controller->slots[0].caps &
(MMC_CAP_4_BIT_DATA | MMC_CAP_8_BIT_DATA)) {
omap_mux_init_signal("sdmmc3_dat1",
OMAP_PIN_INPUT_PULLUP);
omap_mux_init_signal("sdmmc3_dat2",
OMAP_PIN_INPUT_PULLUP);
omap_mux_init_signal("sdmmc3_dat3",
OMAP_PIN_INPUT_PULLUP);
}
if (mmc_controller->slots[0].caps &
MMC_CAP_8_BIT_DATA) {
omap_mux_init_signal("sdmmc3_dat4.sdmmc3_dat4",
OMAP_PIN_INPUT_PULLUP);
omap_mux_init_signal("sdmmc3_dat5.sdmmc3_dat5",
OMAP_PIN_INPUT_PULLUP);
omap_mux_init_signal("sdmmc3_dat6.sdmmc3_dat6",
OMAP_PIN_INPUT_PULLUP);
omap_mux_init_signal("sdmmc3_dat7.sdmmc3_dat7",
OMAP_PIN_INPUT_PULLUP);
}
}
Step 3.
In file kernla/arch/arm/mach-omap2/mux34xx.c
Add the pin mux for support MMC3 interface. ( According the schematics and TRM)
static struct omap_mux __initdata omap3_muxmodes[] = {
……..
//MMC3_CLK
_OMAP3_MUXENTRY(ETK_CLK, 12,
"etk_clk", "mcbsp5_clkx", "sdmmc3_clk", "hsusb1_stp",
"gpio_12", "mm1_rxdp", "hsusb1_tll_stp", "hw_dbg0"),
//MMC3_CMD
_OMAP3_MUXENTRY(ETK_CTL, 13,
"etk_ctl", NULL, "sdmmc3_cmd", "hsusb1_clk",
"gpio_13", NULL, "hsusb1_tll_clk", "hw_dbg1"),
//MMC3_DATA0
_OMAP3_MUXENTRY(ETK_D4, 18,
"etk_d4", "mcbsp5_dr", "sdmmc3_data0", "hsusb1_data4",
"gpio_18", NULL, "hsusb1_tll_data4", "hw_dbg6"),
//MMC3_DATA1
_OMAP3_MUXENTRY(ETK_D5, 19,
"etk_d5", "mcbsp5_fsx", "sdmmc3_data1", "hsusb1_data5",
"gpio_19", NULL, "hsusb1_tll_data5", "hw_dbg7"),
//MMC3_DATA2
_OMAP3_MUXENTRY(ETK_D6, 20,
"etk_d6", "mcbsp5_dx", "sdmmc3_data2", "hsusb1_data6",
"gpio_20", NULL, "hsusb1_tll_data6", "hw_dbg8"),
//MMC3_DATA3
_OMAP3_MUXENTRY(ETK_D6, 17,
"etk_d3", "mcbspi3_clk", "sdmmc3_data3", "hsusb1_data7",
"gpio_17", NULL, "hsusb1_tll_data7", "hw_dbg5")
………..
}
Step 4.
In file u-boot/ti/evm/evm.h
Add the mux configuration for that pin at u-boot.
#define MUX_EVM() \
………
/* SDIO Interface to WIFI Module */ \
MUX_VAL(CP(ETK_CLK_ES2), (IEN | PTU | EN | M4)) /*MMC3_CLK*/\
MUX_VAL(CP(ETK_CTL_ES2), (IEN | PTU | EN | M4)) /*MMC3_CMD*/\
MUX_VAL(CP(ETK_D4_ES2), (IEN | PTU | EN | M4))/*MMC3_DATA0*/\
MUX_VAL(CP(ETK_D5_ES2), (IEN | PTU | EN | M4))/*MMC3_DATA1*/\
MUX_VAL(CP(ETK_D6_ES2), (IEN | PTU | EN | M4))/*MMC3_DATA2*/\
MUX_VAL(CP(ETK_D3_ES2), (IEN | PTU | EN | M4))/*MMC3_DATA3*/\
……..
#endif
Porting wg7210(WL1251) with Linux 2.6.37 on AM18
Below is port of wg7210 info for kernel 2.6.37 with Linux on the AM18 platform.
First, your can get patches and nlcp driver ( modifies to wg7210 ) with firmware 4.0.4.32 from my git.
kernel patches ( include firmware for wg7210 ):
$ git clone git://github.com/dickychiang/am18-wg7210-patch.git
compat-wireless-r4-11-wg7210 :
$ git clone git://github.com/dickychiang/compat-wireless-r4-11.git
The driver will support iw tool to configure wireless.
Also the porting of wg7210 need to take care to important the following :
a) wg7210 has inside the eeprom. To fill structure in wl12xx_platform_data of "use_eeprom".
In board-*.c file :
static struct wl12xx_platform_data da850_wl12xx_wlan_data __initdata = {
.irq = -1,
.board_ref_clock = CONFIG_DA850_MISTRAL_WL12XX_
.platform_quirks = WL12XX_PLATFORM_QUIRK_EDGE_
.use_eeprom = 1,
};
If already, in insert wl1251.ko module will be R/W to eeprom and create a network interface. ( Note, check the irq is work well and connected to EVB.)
And then insert wl1251_sdio.ko will be download firmware into chip.
wl1251: chip id 0x7020101 (1251 PG11)
wl1251: firmware booted (Rev 4.0.4.3.5)
b) Since it the SDIO of CCCR,CIS,FBR is in not corrent. so kernel can not to get right information to match for wg7210. My ideas is give the card information to kernel such as vendor and device id which let kernel to know the sdio device is match to my sdio driver for wg7210.
In drivers/mmc/core/sdio.c :
b-1) Mark the read cccr,cis at mmc_sdio_init_card func.
#ifndef CONFIG_WG7210
err = sdio_read_cccr(card);
if (err)
goto remove;
#endif
#ifndef CONFIG_WG7210
err = sdio_read_common_cis(card);
if (err)
goto remove;
#endif
To fill the card''s maximum speed with clock. ( Default the value is get from cccr register )
#ifdef CONFIG_WG7210
card->cis.max_dtr = 25000000;
#endif
mmc_set_clock(host, mmc_sdio_get_max_clock(card));
b-2) Mark the read fbr and set the id's info to structure sdio_func at sdio_init_func.
#ifndef CONFIG_WG7210
if (!(card->quirks & MMC_QUIRK_NONSTD_SDIO)) {
ret = sdio_read_fbr(func);
if (ret)
goto fail;
ret = sdio_read_func_cis(func);
if (ret)
goto fail;
} else {
func->vendor = func->card->cis.vendor;
func->device = func->card->cis.device;
func->max_blksize = func->card->cis.blksize;
}
#else
func->vendor = 0x104c;
func->device = 0x9066;
func->max_blksize = 4096;
#endif
Note, the max block size value is depend on mmc host controller, if not to match wii be failed in send CMD52.
c) Modify the download firmware path in nlcp driver :
In compat-wireless/drivers/net/
#define WL1251_FW_NAME "ti-connectivity/wl1251-fw.
#define WL1251_NVS_NAME "ti-connectivity/wl1251-nvs.
d) If want to debug NLCP driver,do it to following. ( The method can used to wl12xx )
look at compat-wireless/driver/net/
enum {
DEBUG_NONE = 0,
DEBUG_IRQ = BIT(0),
DEBUG_SPI = BIT(1),
DEBUG_BOOT = BIT(2),
DEBUG_MAILBOX = BIT(3),
DEBUG_NETLINK = BIT(4),
DEBUG_EVENT = BIT(5),
DEBUG_TX = BIT(6),
DEBUG_RX = BIT(7),
DEBUG_SCAN = BIT(8),
DEBUG_CRYPT = BIT(9),
DEBUG_PSM = BIT(10),
DEBUG_MAC80211 = BIT(11),
DEBUG_CMD = BIT(12),
DEBUG_ACX = BIT(13),
DEBUG_ALL = ~0,
};
#define DEBUG_LEVEL (DEBUG_NONE)
To modifies the DEBUG_LEVEL for you want to check the driver info. Suppose I wonder to see the BOOT and MAC80211 information :
DEBUG_BOOT = BIT(2) => (1 << 2) = 0x4
DEBUG_MAC80211 = BIT(11) => (1 << 11) = 0x800
so the answer :
#deinfe DEBUG_LEVEL 0x804
Re-build it now. And then to entry the file system ( For example with Linux based ) and enable all kernel prints level.
$ echo 8 > /proc/sys/kernel/printk
Running daemon for print the kernel logs :
$ cat /proc/kmsg &
Your can see the debug message when insert wl1251.ko ( or wl12xx.ko ) and wl1251_sdio.ko ( or wl12xx_sdio.ko ).
11/12/2011
在rowboat的Android 2.3.4 (based on DM37),點擊webkit的browser常常都會crash...
這現象非常奇怪,一直以為是我porting wifi 出了問題...
一路trace過去,終於發現原來是因為Google的webkit在開啟預設頁面時,都會去啟動GPS來尋找location相關資料,而且還沒有error handle的處理方式...
而啟動的service叫做Geolocationservice,一開始在external/webkit/Webcore把ENABLE_GEOLOCATION的定義拿掉,但還是一樣不行....
在想不到更好的解決方式之下...只好直接從Java裡把gps register拿掉,可以暫時避掉這問題。
From 30fe105d47ec283b46865d4c94c17c065048bd3e Mon Sep 17 00:00:00 2001
From: Dicky Chiang
Date: Fri, 11 Nov 2011 04:17:12 +0800
Subject: [PATCH 20/20] fix browser crashes out of the webkit
---
.../java/android/webkit/GeolocationService.java | 4 ++++
1 files changed, 4 insertions(+), 0 deletions(-)
diff --git a/frameworks/base/core/java/android/webkit/GeolocationService.java b/frameworks/base/core/java/android/webkit/ GeolocationService.java
index 24306f4..348715f 100755
--- a/frameworks/base/core/java/android/webkit/GeolocationService.java
+++ b/frameworks/base/core/java/android/webkit/GeolocationService.java
@@ -158,10 +158,14 @@ final class GeolocationService implements LocationListener {
try {
mLocationManager.requestLocationUpdates(LocationManager.NETWORK_PROVIDER, 0, 0, this);
mIsNetworkProviderAvailable = true;
+
+ // Can be register it if gps device on platform, otherwise to disable it.
+ /*
if (mIsGpsEnabled) {
mLocationManager.requestLocationUpdates(LocationManager.GPS_PROVIDER, 0, 0, this);
mIsGpsProviderAvailable = true;
}
+ */
} catch(SecurityException e) {
Log.e(TAG, "Caught security exception registering for location updates from system. " +
"This should only happen in DumpRenderTree.");
--
1.7.4.1
I/ActivityManager(  863): Starting activity: Intent { act=android.intent.action.MAIN flg=0x10000000 cmp=com.android.browser/.BrowserActivity }
I/ActivityManager(  863): Start proc com.android.browser for activity com.android.browser/.BrowserActivity: pid=1341 uid=10014 gids={3003, 1015}
I/ActivityThread( 1341): Publishing provider browser: com.android.browser.BrowserProvider
I/ActivityManager(  863): Displayed activity com.android.browser/.BrowserActivity: 1525 ms (total 1525 ms)
D/dalvikvm( 1341): GC_FOR_MALLOC freed 3858 objects / 224504 bytes in 122ms
W/dalvikvm( 1341): JNI WARNING: JNI method called with exception raised
W/dalvikvm( 1341):              in Landroid/webkit/JWebCoreJavaBridge;.sharedTimerFired ()V (NewLocalRef)
W/dalvikvm( 1341): Pending exception is:
I/dalvikvm( 1341): Ljava/lang/IllegalArgumentException;: provider=gps
I/dalvikvm( 1341):  at android.os.Parcel.readException(Parcel.java:1251)
I/dalvikvm( 1341):  at android.os.Parcel.readException(Parcel.java:1235)
I/dalvikvm( 1341):  at android.location.ILocationManager$Stub$Proxy.requestLocationUpdates(ILocationManager.java:516)
I/dalvikvm( 1341):  at android.location.LocationManager._requestLocationUpdates(LocationManager.java:711)
I/dalvikvm( 1341):  at android.location.LocationManager.requestLocationUpdates(LocationManager.java:630)
I/dalvikvm( 1341):  at android.webkit.GeolocationService.registerForLocationUpdates(GeolocationService.java:162)
I/dalvikvm( 1341):  at android.webkit.GeolocationService.start(GeolocationService.java:66)
I/dalvikvm( 1341):  at android.webkit.JWebCoreJavaBridge.sharedTimerFired(Native Method)
I/dalvikvm( 1341):  at android.webkit.JWebCoreJavaBridge.fireSharedTimer(JWebCoreJavaBridge.java:88)
I/dalvikvm( 1341):  at android.webkit.JWebCoreJavaBridge.handleMessage(JWebCoreJavaBridge.java:105)
I/dalvikvm( 1341):  at android.os.Handler.dispatchMessage(Handler.java:99)
I/dalvikvm( 1341):  at android.os.Looper.loop(Looper.java:123)
I/dalvikvm( 1341):  at android.webkit.WebViewCore$WebCoreThread.run(WebViewCore.java:621)
I/dalvikvm( 1341):  at java.lang.Thread.run(Thread.java:1096)
I/dalvikvm( 1341): "WebViewCoreThread" prio=5 tid=11 NATIVE
I/dalvikvm( 1341):   | group="main" sCount=0 dsCount=0 s=N obj=0x4402d3e8 self=0x254b78
I/dalvikvm( 1341):   | sysTid=1354 nice=0 sched=0/0 cgrp=unknown handle=2444472
I/dalvikvm( 1341):   at android.webkit.JWebCoreJavaBridge.sharedTimerFired(Native Method)
I/dalvikvm( 1341):   at android.webkit.JWebCoreJavaBridge.fireSharedTimer(JWebCoreJavaBridge.java:88)
I/dalvikvm( 1341):   at android.webkit.JWebCoreJavaBridge.handleMessage(JWebCoreJavaBridge.java:105)
I/dalvikvm( 1341):   at android.os.Handler.dispatchMessage(Handler.java:99)
I/dalvikvm( 1341):   at android.os.Looper.loop(Looper.java:123)
I/dalvikvm( 1341):   at android.webkit.WebViewCore$WebCoreThread.run(WebViewCore.java:621)
I/dalvikvm( 1341):   at java.lang.Thread.run(Thread.java:1096)
I/dalvikvm( 1341):
這現象非常奇怪,一直以為是我porting wifi 出了問題...
一路trace過去,終於發現原來是因為Google的webkit在開啟預設頁面時,都會去啟動GPS來尋找location相關資料,而且還沒有error handle的處理方式...
而啟動的service叫做Geolocationservice,一開始在external/webkit/Webcore把ENABLE_GEOLOCATION的定義拿掉,但還是一樣不行....
在想不到更好的解決方式之下...只好直接從Java裡把gps register拿掉,可以暫時避掉這問題。
From 30fe105d47ec283b46865d4c94c17c065048bd3e Mon Sep 17 00:00:00 2001
From: Dicky Chiang
Date: Fri, 11 Nov 2011 04:17:12 +0800
Subject: [PATCH 20/20] fix browser crashes out of the webkit
---
.../java/android/webkit/GeolocationService.java | 4 ++++
1 files changed, 4 insertions(+), 0 deletions(-)
diff --git a/frameworks/base/core/java/android/webkit/GeolocationService.java b/frameworks/base/core/java/android/webkit/ GeolocationService.java
index 24306f4..348715f 100755
--- a/frameworks/base/core/java/android/webkit/GeolocationService.java
+++ b/frameworks/base/core/java/android/webkit/GeolocationService.java
@@ -158,10 +158,14 @@ final class GeolocationService implements LocationListener {
try {
mLocationManager.requestLocationUpdates(LocationManager.NETWORK_PROVIDER, 0, 0, this);
mIsNetworkProviderAvailable = true;
+
+ // Can be register it if gps device on platform, otherwise to disable it.
+ /*
if (mIsGpsEnabled) {
mLocationManager.requestLocationUpdates(LocationManager.GPS_PROVIDER, 0, 0, this);
mIsGpsProviderAvailable = true;
}
+ */
} catch(SecurityException e) {
Log.e(TAG, "Caught security exception registering for location updates from system. " +
"This should only happen in DumpRenderTree.");
--
1.7.4.1
10/30/2011
GIT協同開發
自己學git的時間,斷斷續續加起來也不過2個多月的時間,認識週遭的同事大多也都使用SVN,鮮少接觸到git。
正如之前說的,用git的時機大多只管理我自己的job...很少用git跟人一起協同開發..
而自己對git的原理也矇矇矓矓的,只知道git對我來說,是個非常棒的軟體管理和提高效率的好工具!
奈何它也確實學習曲線頗高,剛接觸的人如果不是抱有很大的興趣的話,很容易讓人打退堂鼓。
前陣子公司正好要開始開發系統的東西,意識到沒有版本控制的工具,真的會一團亂...所以開會提出要架設server來管理版本。
這對我來說實在是大好機會 ! 立刻毫不猶豫把Git提出來,並分析Git的好處和它的優秀又快速的branch...
很可惜的,最終還是敗給SVN,因為SVN相對而言較簡單,我也承認SVN的確入門....但我對它的歷史查找和開設branch實在是無法認同。
SVN架了一陣子,因為種種因素而失敗,所以最後主管同意讓我去架設git server,這讓我高興了好一陣子呀 XD
雖然server我不會架...但弄一個簡單的repository讓同事clone這點我還是會的qq
因為公司有同事並不熟悉git,所以就寫了這些東西,順便拷貝上來作筆記 :)
============
整個source branch model我都是參考這篇,這對個人或小型團隊真的是滿漂亮的模型,我自己的job也都是這樣去分的 :)
一般而言,我都會在遠端開設develop分支,所以clone下來之後可以看到兩個遠端分支 :


預設都會指向遠端master分支,因為master屬於穩定發佈的分支,是不能隨便去merge或是commit,所以應該在自己的本地去新建一個分支,這個分支的名字最好對應遠端develop,讓自己知道該向哪一個遠端分支進行提交 :

.png)
"git co -b develop" 這意思就是在當前的分支(master)checkout出來一份並切換到你建立的分支底下,所以這時master和develop就屬於同一平行線上,不管你對develop做多少修改,都不會影響到master分支,所以從develop分支底下就可以安心進行工作了.
但依我自己的習慣,我建議在develop底下再建立一個分支來開發,等最後開發好了再merge到develop。這樣做的原因是一來不用擔心自己把develop這分支弄壞,造成其它人的不便。二來隨時可以很方便的對develop分支進行diff,來觀察自己改了什麼導致系統不正常或其它原因。三來是怕有時腦神經大條,commit到錯的檔案或是忘了add ( 這點我常犯的XD),最後還要用reset回去...
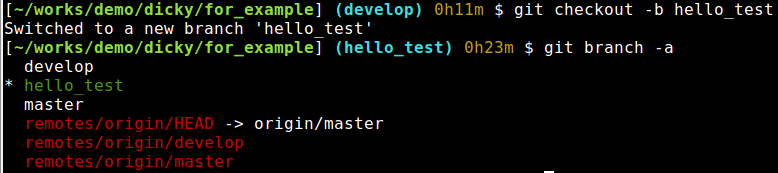
所以在develop分支底下再checkout出來一分 :
現在可以安心進行開發了,先在a.c裡面加了一個printf :

可以看到多了一個"Hello test",還有status,以及最後再把它commit上去,現在回到develop底下,再merge hello_test,讓develop有了hello_test功能 :
加"--no-ff"是為了讓merge之後的訊息不要遺失,清楚呈現整個分支merge狀況,像這樣 :

現在dicky的工作結束了,所以可以對遠端develop提交成果,讓大家可以使用你的功能 :

註 : 如果發現自己merge的分支裡面有存在很嚴重的bug,但都己經commit和push到遠端分支了....該怎麼還原遠端分支 ? 用reset只對自己的本地有用而己...
我不清楚是否還有更好的辦法,我自己是先創個分支把develop備份起來,再回到develop使用reset --hard還原,然後把遠端develop砍了....再重新把reset過的develop push上去 :
$ git checkout -b develop_bak develop // 先備份develop
$ git checout develop // 切回develop
$ git reset --hard 2941b2d2e89adc311354bffea4fb521941976790 // 還原
$ git push origin :develop // 把遠端分支砍了
$ git push origin develop // 再重新push develop到遠端
假設Jimmy也clone一份,但他需要知道先前有沒有人更新過,所以在工作前要把server上資料pull下來:

從git回應的訊息來看,Jimmy知道有人創建develop並在更新遠端develop,這時Jimmy想要跟蹤這個遠端分支develop,並且以後也想在develop做開發 ,可以運行"git checkout --track origin/develop" :

這樣一來,Jimmy以後可以在自己的develop分支來進行開發和提交了。
假設另一個人Jack在develop更新了功能並己經更新,但Dicky並不知道,也更新了develop,commit之後在push時會出現git需要先pull :

Dicky也對遠端develop進行pull,但卻發現在Auto merge a.c 時發生錯誤 :

這時就需要自己手動把錯誤修改回來再commit回去,先來看看錯誤是長什麼樣子 :

所謂的"HEAD"就是自己所增加的程式,而另外一個用"="分開並用哈希做為結尾就是Jack所增加的程式,通常這種錯誤都是發生在兩方修改同一行,Git是沒辦法解決這種衝突,需要自行修改,修改完之後長這樣 :

這時Dicky就可以再重新commit和push上去了 :

Subscribe to:
Posts (Atom)